iOSのUILabelにアンダーラインを引く方法
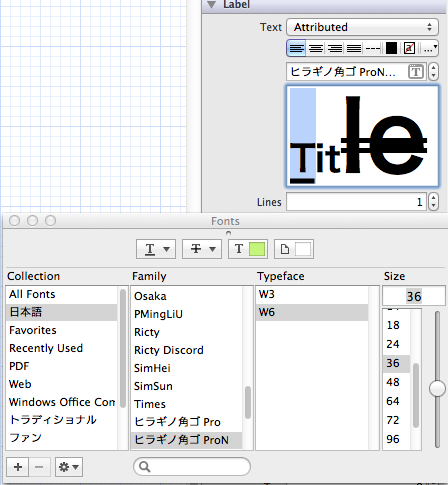
iOS6以上の場合、 UILabel#attributedText で簡単にアンダーラインを引くことが出来ます。 プログラムだけではなく、storyboardでも UILabel の Text を plain から attributed に設定することで、表示されている文字1文字単位で Fontsパネル から簡単に変更可能です。
iOS5以下(iOS5でしか確認していませんが)の場合は、 UIView#drawRect で CG* 系のライブラリを使ってガリガリ書く必要があります。
static const CGFloat kPaddingWidth = 10.0;
static const CGFloat kPaddingHeight = 5.0;
static const CGFloat kLineWidth = 1.0;
static const CGFloat kRGBRed = 0.5;
static const CGFloat kRGBGreen = 0.5;
static const CGFloat kRGBBlue = 0.5;
static const CGFloat kRGBAlpha = 1.0;

-(void)drawRect:(CGRect)rect
{
    [super drawRect:rect];

    //drawing underline
    CGContextRef context = UIGraphicsGetCurrentContext();
    CGContextSetRGBStrokeColor(context, kRGBRed, kRGBGreen, kRGBBlue, kRGBAlpha);
    CGContextSetLineWidth(context, kLineWidth);
    CGContextMoveToPoint(context, rect.origin.x + kPaddingWidth, rect.origin.y+rect.size.height - kPaddingHeight);
    CGContextAddLineToPoint(context, rect.origin.x+rect.size.width - kPaddingWidth, rect.origin.y+rect.size.height - kPaddingHeight);
    CGContextStrokePath(context);
}
最初 drawRect でがんばって書いてその後 attributedText に気づいたのは私ですが何か(涙)?