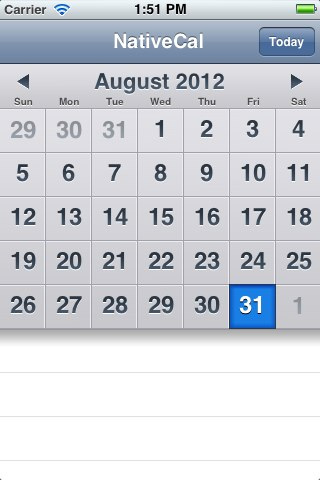
KalCalenderをStoryboard上の環境に適用させる
Kal というiOSのネィティブそっくりのカレンダーを提供してくれるライブラリがあります。しかもライセンスはMITという。このライブラリは便利なんですが、XCode4.5 / iOS6系の環境でstoryboard上に展開しようとしてちょっと考えたで、やり方をメモしておきます。
Kalをプロジェクトに連携させる
Kalのサイトではプロジェクト連携を以下の様に行うようにリファレンスが提示されています。
- Clone the Kal git repository: git clone git://github.com/klazuka/Kal.git. Make sure you store the repository in a permanent place because Xcode will need to reference the files every time you compile your project.
- Locate the “Kal.xcodeproj” file under “Kal/src/”. Drag Kal.xcodeproj and drop it onto the root of your Xcode project’s “Groups and Files” sidebar. A dialog will appear – make sure “Copy items” is unchecked and “Reference Type” is “Relative to Project” before clicking “Add”.
- Now you need to link the Kal static library to your project. Select the Kal.xcodeproj file that you just added to the sidebar. Under the “Details” table, you will see libKal.a. Check the checkbox on the far right for this file. This will tell Xcode to link against Kal when building your app.
- Now you need to add Kal as a dependency of your project so that Xcode will compile it whenever you compile your project. Expand the “Targets” section of the sidebar and double-click your application’s target. Under the “General” tab you will see a “Direct Dependencies” section. Click the “+” button, select “Kal” and click “Add Target”.
- Now you need to add the bundle of image resources internally used by Kal’s UI. Locate “Kal.bundle” under “Kal/src” and drag and drop it into your project. A dialog will appear – make sure “Create Folder References” is selected, “Copy items” is unchecked, and “Reference Type” is “Relative to Project” before clicking “Add”.
- Finally, we need to tell your project where to find the Kal headers. Open your “Project Settings” and go to the “Build” tab. Look for “Header Search Paths” and double-click it. Add the relative path from your project’s directory to the “Kal/src” directory.
- While you are in Project Settings, go to “Other Linker Flags” under the “Linker” section, and add “-all_load” to the list of flags.
- You’re ready to go. Just #import “Kal.h” anywhere you want to use KalViewController in your project.
えー、面倒ですねw。面倒なのでpodspecを書いてCocoaPodsで入れる事にします。
Kalにパッチを当てる(storyboard対応)
masterのKalにはstoryboard用の初期化処理が設定されていないため、storyboard上のUIViewControllerに KalViewController を設定しても以下のエラーで落ちてしまいます。
Terminating app due to uncaught exception ‘NSInternalInconsistencyException’, reason: ‘Failed to find corresponding tile for date 0/0/0’
これはstoryboard用の初期化処理が行われていない事が原因なので initWithCoder の実装を行うように設定します。ありがたい事にその修正を行っている人がいたのでマージさせてもらいます。
$ git clone https://github.com/klazuka/Kal
$ cd Kal
$ git remote add timle8n1 https://github.com/timle8n1/Kal.git
$ git fetch timle8n1
$ git cherry-pick 9cc6099e2866746f481a95b792a699267e9c5865
これでOKです。一応diffはこんな感じになります。
diff --git src/KalViewController.m src/KalViewController.m
index 62245b8..90b21c7 100644
--- src/KalViewController.m
+++ src/KalViewController.m
@@ -40,18 +40,31 @@ NSString *const KalDataSourceChangedNotification = @"KalDataSourceChangedNotific

 @synthesize dataSource, delegate, initialDate, selectedDate;

-- (id)initWithSelectedDate:(NSDate *)date
+- (void)setupWithDate:(NSDate *)date
 {
-  if ((self = [super init])) {
     logic = [[KalLogic alloc] initForDate:date];
     self.initialDate = date;
     self.selectedDate = date;
     [[NSNotificationCenter defaultCenter] addObserver:self selector:@selector(significantTimeChangeOccurred) name:UIApplicationSignificantTimeChangeNotification object:nil];
     [[NSNotificationCenter defaultCenter] addObserver:self selector:@selector(reloadData) name:KalDataSourceChangedNotification object:nil];
+}
+
+- (id)initWithSelectedDate:(NSDate *)date
+{
+  if ((self = [super init])) {
+      [self setupWithDate:date];
   }
   return self;
 }

+- (id)initWithCoder:(NSCoder *)aDecoder
+{
+    if ([super initWithCoder:aDecoder]) {
+        [self setupWithDate:[NSDate date]];
+    }
+    return self;
+}
+
 - (id)init
 {
   return [self initWithSelectedDate:[NSDate date]];
Kalにローカライズ対応を行う(日付のフォーマット)
Kalはとても素敵なライブラリなのですが、日付のフォーマットが日本語ロケールで表示されない問題があります。システムロケールでカレンダーが表示されるように修正します。これもForkされた方が修正されているので、ありがたく拝借させて頂きます。
$ cd Kal
$ git remote add biohazardffm https://github.com/biohazardffm/Kal.git
$ git fetch biohazardffm
$ git cherry-pick 4bd66c948b16cd17863ca06e6dfc7a22cc964fac
ただし、これだけだと、タイトル部分しか変更されず、かつフォーマットが固定されてしまいます。そこで曜日に関してもシステムロケールで表示されるようにする設定を行います。
# 日付のフォーマットが `LLLL yyyy` に固定されてしまっていますがこの変更はいったん行いません。
上記の ‘4bd66c948b16cd17863ca06e6dfc7a22cc964fac’ をマージした結果に追加して KalView 側で曜日設定のフォーマットを定義している箇所を修正します。修正結果はこんな感じです。
diff --git src/KalLogic.m src/KalLogic.m
index c15e161..adc8981 100644
--- src/KalLogic.m
+++ src/KalLogic.m
@@ -34,6 +34,8 @@
 {
   if ((self = [super init])) {
     monthAndYearFormatter = [[NSDateFormatter alloc] init];
+    [monthAndYearFormatter setLocale:[[NSLocale alloc] initWithLocaleIdentifier:[NSLocale preferredLanguages][0]]];
+    //TODO: custom format
     [monthAndYearFormatter setDateFormat:@"LLLL yyyy"];
     [self moveToMonthForDate:date];
   }
diff --git src/KalView.m src/KalView.m
index def1dcb..3815830 100644
--- src/KalView.m
+++ src/KalView.m
@@ -126,7 +126,9 @@ static const CGFloat kMonthLabelHeight = 17.f;
   [nextMonthButton release];

   // Add column labels for each weekday (adjusting based on the current locale's first weekday)
-  NSArray *weekdayNames = [[[[NSDateFormatter alloc] init] autorelease] shortWeekdaySymbols];
+  NSDateFormatter *formatter = [[[NSDateFormatter alloc] init] autorelease];
+  [formatter setLocale:[[NSLocale alloc] initWithLocaleIdentifier:[NSLocale preferredLanguages][0]]];
+  NSArray *weekdayNames = [formatter shortWeekdaySymbols];
   NSArray *fullWeekdayNames = [[[[NSDateFormatter alloc] init] autorelease] standaloneWeekdaySymbols];
   NSUInteger firstWeekday = [[NSCalendar currentCalendar] firstWeekday];
   NSUInteger i = firstWeekday - 1;
これで日本語で曜日が表示されるようになります(日本語設定ならば)。曜日が日本人的にはすごい微妙ですが、まぁ後ほど修正する方向で。

画像がバンドルされずカレンダーがおかしくなる
後述するCocoaPodsで取り込めば大丈夫なのですが、プロジェクト連携した場合に私の設定がおかしかったのか、背景画像が適用されないことがありました。とりあえず kal.bundle をクラス直下においてあげると無事認識されて表示されました。
podspecの作成
Note
12/18 追記 以下に独自に podspec を作成する方法を書いていますが、さっき確認してみたら CocoaPods/Specs に数ヶ月前に追加されていました。そっちを使う方が早いでしょうー(カレンダーやstoryboardのパッチは別途必要ですが)
簡単に導入するためにpodspecを書いてローカルリポジトリに登録しておいて、 pod install でインストール出来るようにpodspecを作成します。こちらは作成したpodspecを張っておきます。リンクが今まで修正した版ではなくオリジナルのKalを見ているので、必要があれば自分でForkして上記対応を行う事をお勧めします。
Pod::Spec.new do |s|
  s.name         = "Kal"
  s.version      = "0.0.1snapshot"
  s.summary      = "A calendar component for the iPhone (the UI is designed to match MobileCal)"
  s.homepage     = "http://www.thepolypeptides.com"
  s.license      = 'MIT (example)'
  s.author       = { "Keith Lazuka" => "klazuka@gmail.com" }
  s.source       = { :git => "https://github.com/klazuka/Kal.git", :commit => "2ebc23a24290f535073ce57ee2a630de8e2b804c" }
  s.platform     = :ios, '5.0'
  s.source_files = 'src/*.{h,m}'
  s.resources = "src/Kal.bundle"
  s.framework  = 'UIKit'
end
以上です。
jenkinsでXcode(+cocoapods)向けのビルド環境を構築する(無理矢理な方法)
jenkinsをXcode向けにビルド環境を構築するやり方がいくつかブログにありますが、workspace向けの記事があまりありません。正確には、CocoaPodsを活用したjenkinsのビルド構築の方法が、ですが。
必要に迫られて構築してみたら、微妙にハマったのでやり方をメモしておきます。
基本的な流れとしては、以下の通りです。
- CocoaPodsで依存関係をインストール
- Xcodeを起動する
- Xcode Pluginでビルド実行してIPAファイル化
- Xcodeを閉じる
- sshプラグインなどで、生成されたIPAファイルをOTA環境にupload
# 但し、5は今回省きます
Xcodeを起動する必要性に関して
CocoaPodsを用いてプロジェクトを構築している場合、workspaceフォルダを起動するまでschemeの設定が書き込まれません。 *.workspace は CocoaPods によって生成される2次ファイルのため、コミットしたくありません。そのため、 pod instlal 後に一旦Xcodeを起動してworkspaceファイルを更新する必要があります。
# 起動時のシーケンスをエミュレートしようとしたんですが、変数色々あって実は楽な方へ逃げました(汗。
なお、Xcodeを起動していない状態で、podによって生成されたworkspace領域に対して試しに xcodebuild -list するとこんな感じに言われます。
$ cd sample
$ xcodebuild -list

Information about project "sample":
    Targets:
        sample

    Build Configurations:
        Debug
        Release

    If no build configuration is specified and -scheme is not passed then "Release" is used.

    This project contains no schemes.
ビルド構成
ビルドの方法を以下に記述します。 既にjenkins(およびxcodeプラグイン)のインストールと起動は済んでいると前提とします。
0. バージョン対象外ファイル
プロジェクトルートの * Pods/ * Podfile.lock * <<application>>.xcworkspace は先ほども述べたようにPodsによって生成される2次ファイルのため、バージョン管理対象としません。
1. CocoaPodsによる依存関係のクリーンインストール
Pods / Podfile.lock / <<application>>.workspace を CocoaPods で生成を行います。
$ cd sample
$ pod install
# 上記の理由によりXcodeを一度起動させる必要がある
$ pod install
2. Xcodeの起動
アプリケーションを起動して、xcworkspaceの設定を反映させます。
# (但しXcodeが起動していると手動でXcodeの再読み込みを行うかのチェックが走るので、いったん強制的にXcodeをを落とす)
$ pgrep -f "/Applications/Xcode.app" | xargs kill
$ open sample.xcworkspace
$ sleep 5
2. Xcodeビルドの実行
基本的にはProject指定と同じですが xcodebuild の以下の書式に従うように設定をいじります。
xcodebuild -workspace <workspacename> -scheme <schemeName> [-configuration <configurationname>] [-arch <architecture>]... [-sdk [<sdkname>|<sdkpath>]] [-showBuildSettings] [<buildsetting>=<value>]... [<buildaction>]...
Jenkins上のxcodeのビルド設定のうち Xcode Schema File、 Xcode Workspace File、 Xcode Project Directory 辺りの設定が必要になると思います。
1. Xcodeを終了
Xcodeを終了します。
$ pgrep -f "/Applications/Xcode.app" | xargs kill
これでCocoaPodsで構築しているXcodeプロジェクトをJenkinsでも行うことが可能です(とても微妙ーな方法ですが...。)
以上です。